LEDmePlay®
We really like classic joysticks like the Competition Pro (you will know this if you have ever visited our booth on a faire). However, replicates are rare and if you buy an original classic joystick on ebay, you never know what you get. Thus, we have an alternative you can build on your own: The LEDmePlay® Joypad. This game controller has some advantages in comparison to a classic joystick. It has an analog thumbstick for the directions and two independent fire buttons (in comparison to just one). Nevertheless, it is fully compatible to all games which have been originally developed for a classic joystick. The joypad can easily be built in about 2 hours. You need the following parts:
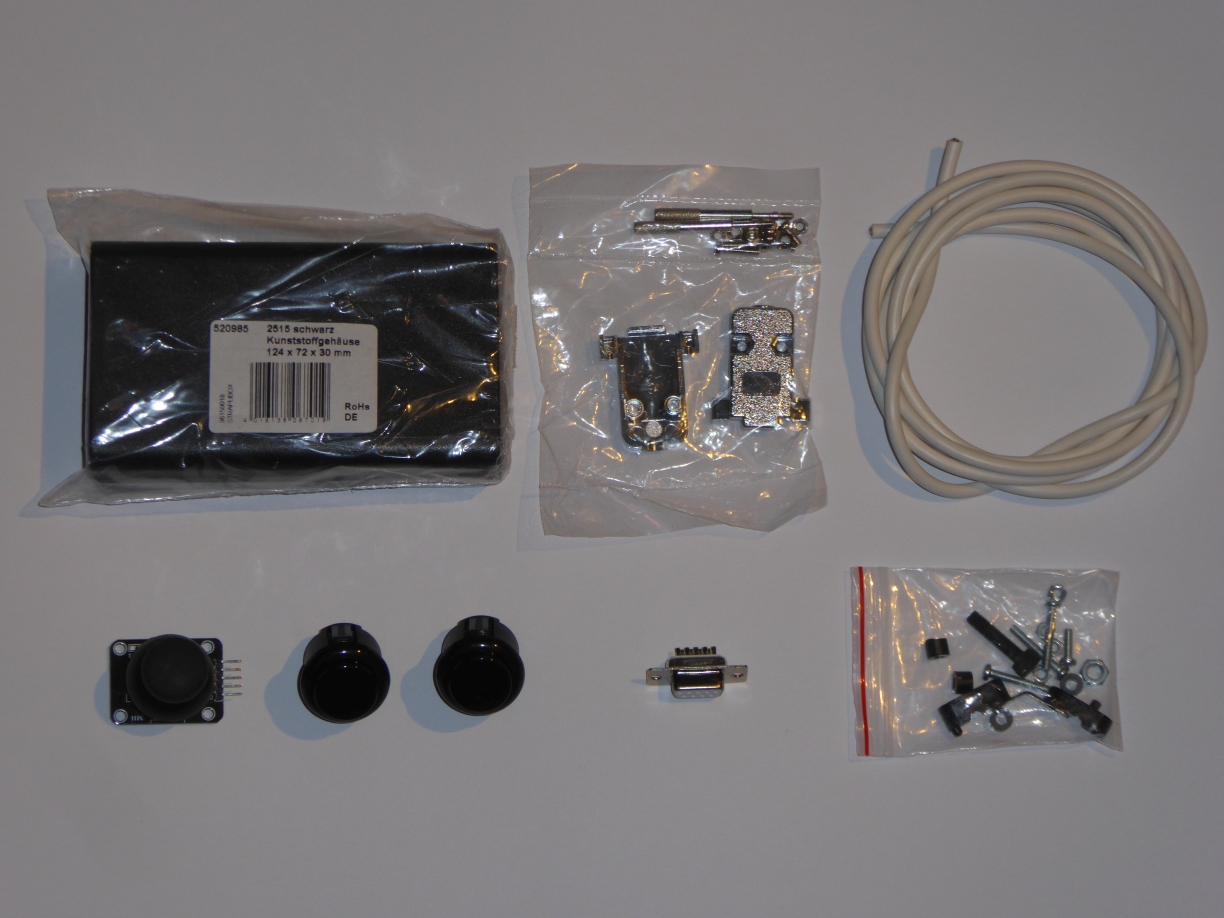
Parts
Thumb joystick (Search for "Arduino Joystick". Some of these have an inbuilt fire button which is not required.)
2 * buttons (For best gaming experience we recommend arcade buttons with a diameter of ~24mm.)
Small plastic case (The case we used has the following dimensions and can be purchased at Conrad with order number 520985: ~12cm * ~7cm * ~3cm)
9-pole D-sub female connector
case for the D-sub female connector with strain relief
strain relief for the control wire in the case
1.5m control wire with 7 lines
4 * distance sleeve (5mm)
4 * M3 screws (15cm)
4 * M3 nuts
4 * rubber feet
Connection of the joypad
Games can be developed in a way that either the joypad or a classic (digital) joystick can be used without any configuration. Of course, in this case, the joypad is fully digital which means that there is a threshold value for the directions on which action is registered. Nevertheless, the two potentiometers of the used thumb joystick are checked on the analog inputs of the Arduino. Unfortunately, although if a digital joystick is connected, some signal is measured on the analog inputs. This would lead to uncontrolled movement. Thus, it is required to identify the joypad if connected to enable distinction of cases. In other words, the analog signal is only evaluated if the LEDmePlay® Joypad is connected in place of a classic joystick.
How does it work? Well, it is pretty easy: It is checked whether the directions for "left" and "right" are pressed simultaneously. These are (1) not required anyway, as we have attached the analog thumb stick to different analog input pins, and, (2) with a digital joystick you cannot trigger two opposing directions simultaneously. Therefore, when both directions are being triggered at the same time, the control logic assumes that a joypad is being used, and the analog pins are evaluated.
The table below shows the pin assignment of the joypad and the differences to a classic (digital) joystick.
Pin on D-sub connector |
Classic Joystick |
Mithotronic® Joypad |
Connections Joy 1 inside of LEDmePlay® (Arduino Mega 2560) |
Connections Joy 2 inside of LEDmePlay® (Arduino Mega 2560) |
| 1 | Up | Fire B (connect to button for "Fire B" together with pin 2) | D30 | D31 |
| 2 | Down | Fire B (connect to button for "Fire B" together with pin 1) | D32 | D33 |
| 3 | Left | Joypad connected (connected directly with Ground) | D34 | D35 |
| 4 | Right | Joypad connected (connected directly with Ground) | D36 | D37 |
| 5 | - | X-analog (connect to VRX of thumb joystick) | A8 | A10 |
| 6 | Fire A (standard fire) | Fire A (connect to button for "Fire A") | D38 | D39 |
| 7 | 5V (optional, e.g. for autofire) | 5V (connect to +5V of thumb joystick) | 5V | 5V |
| 8 | Ground | Ground (connect to GND of thumb joystick, the two buttons "Fire A" and "Fire B", and pin 3 and 4) | Ground | Ground |
| 9 | Fire B (optional) | Y-analog (connect to VRY of thumb joystick) | A9 | A11 |
The 5V power line must be connected to the correspondingly labled pin of the thumb joystick. The Ground line must be connected to a junction connecting the thumb joystick (GND pin), the two buttons "Fire A" and "Fire B" and to the lines for "left" (pin 3) and "right" (pin 4). The latter connection identifies the joypad, as explained above, as a LEDmePlay® Joypad (in comparison to a classic Joystick).
Construction
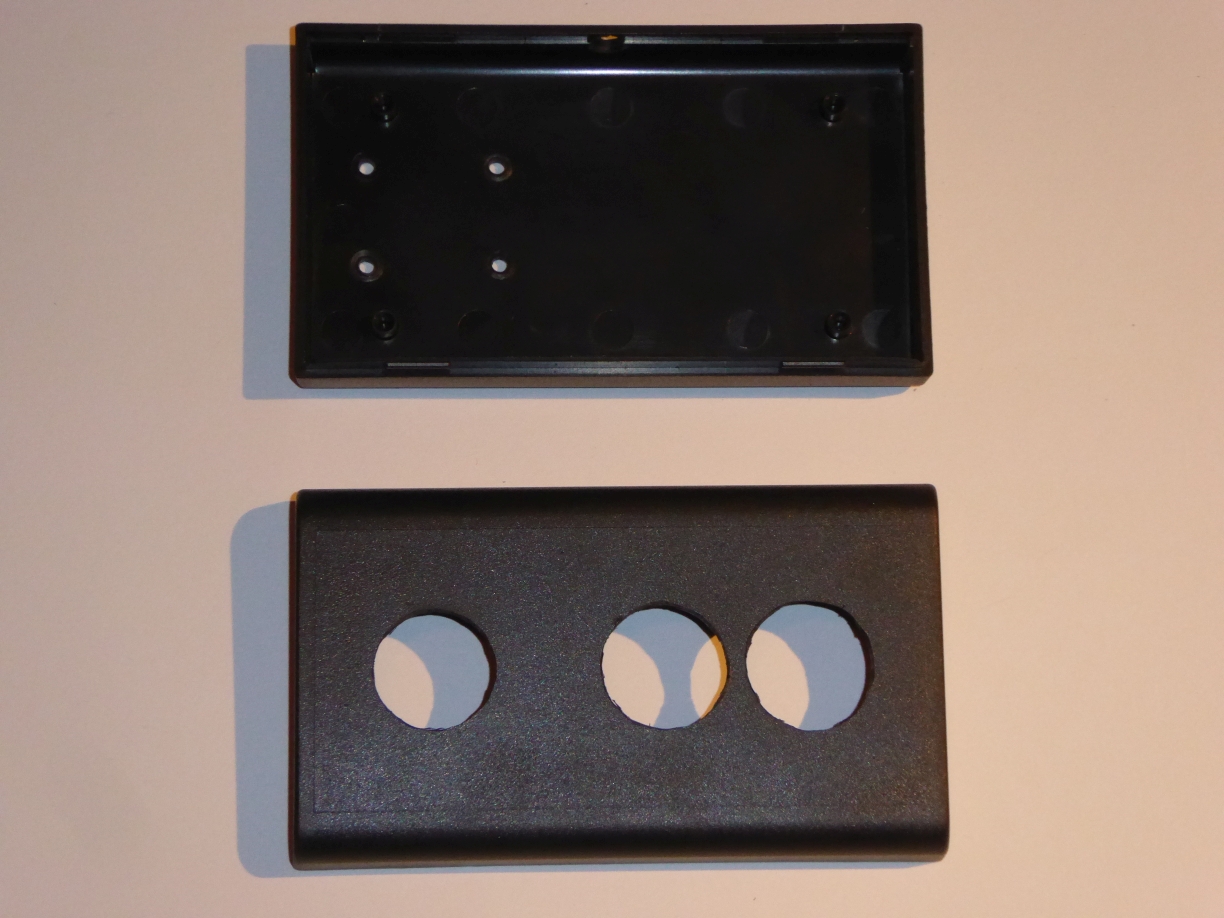
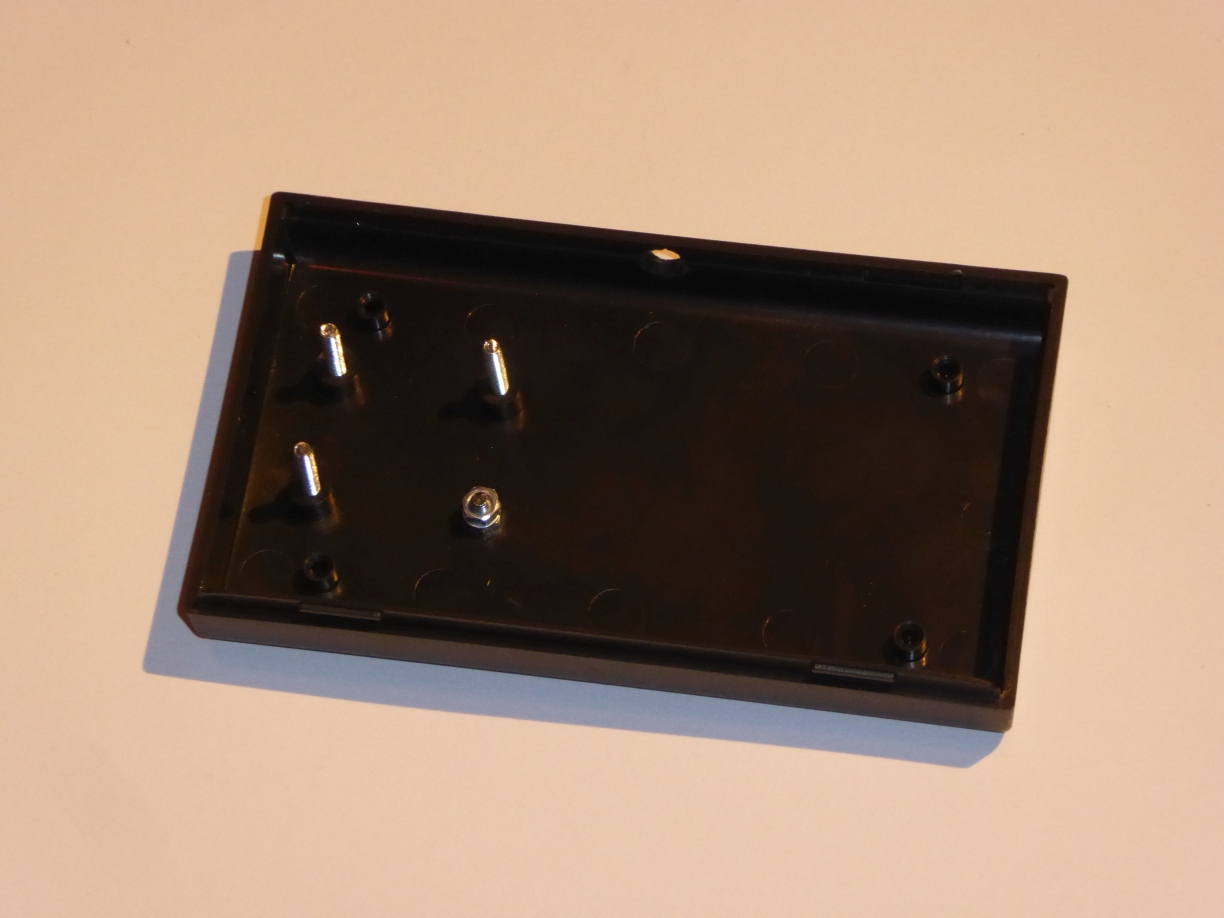
Since you will most likely have a different case and different buttons if you build the joypad, we cannot give a detailled construction guideline. However, we give in the following some general hints for the construction. First, you should check which holes you need for you specific buttons and the thumb stick (for ours it is ~2.3mm). Check which distances between the thumb stick and the buttons is ergonomic for you. However, it must also fit to you case. Draw marks regarding the positions. After that, use a rotary tool to create the holes. You also need 4 holes on the rear side for M3 screws to mount the thumb joystick (use distance sleeves for this). The pictures below show the parts and the ready-made case with the holes.
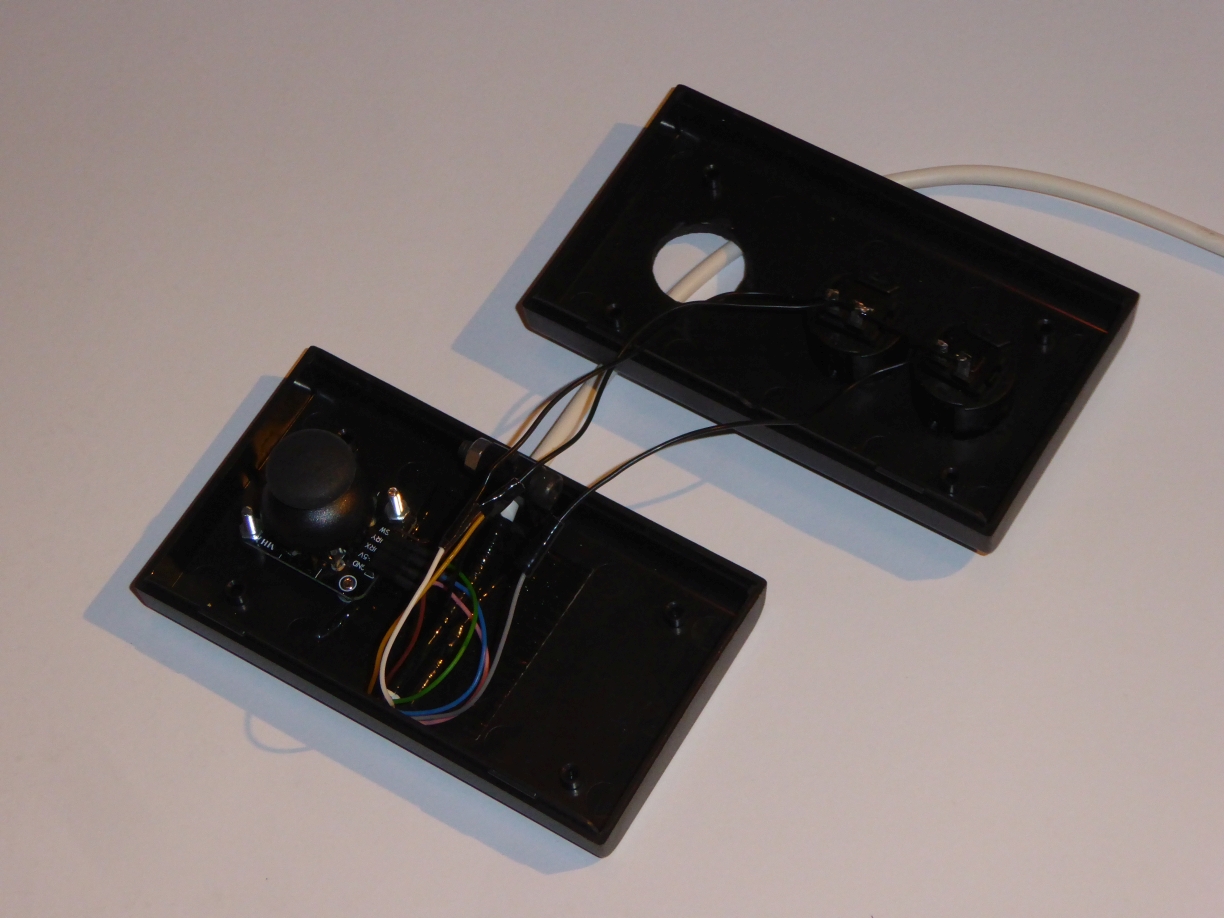
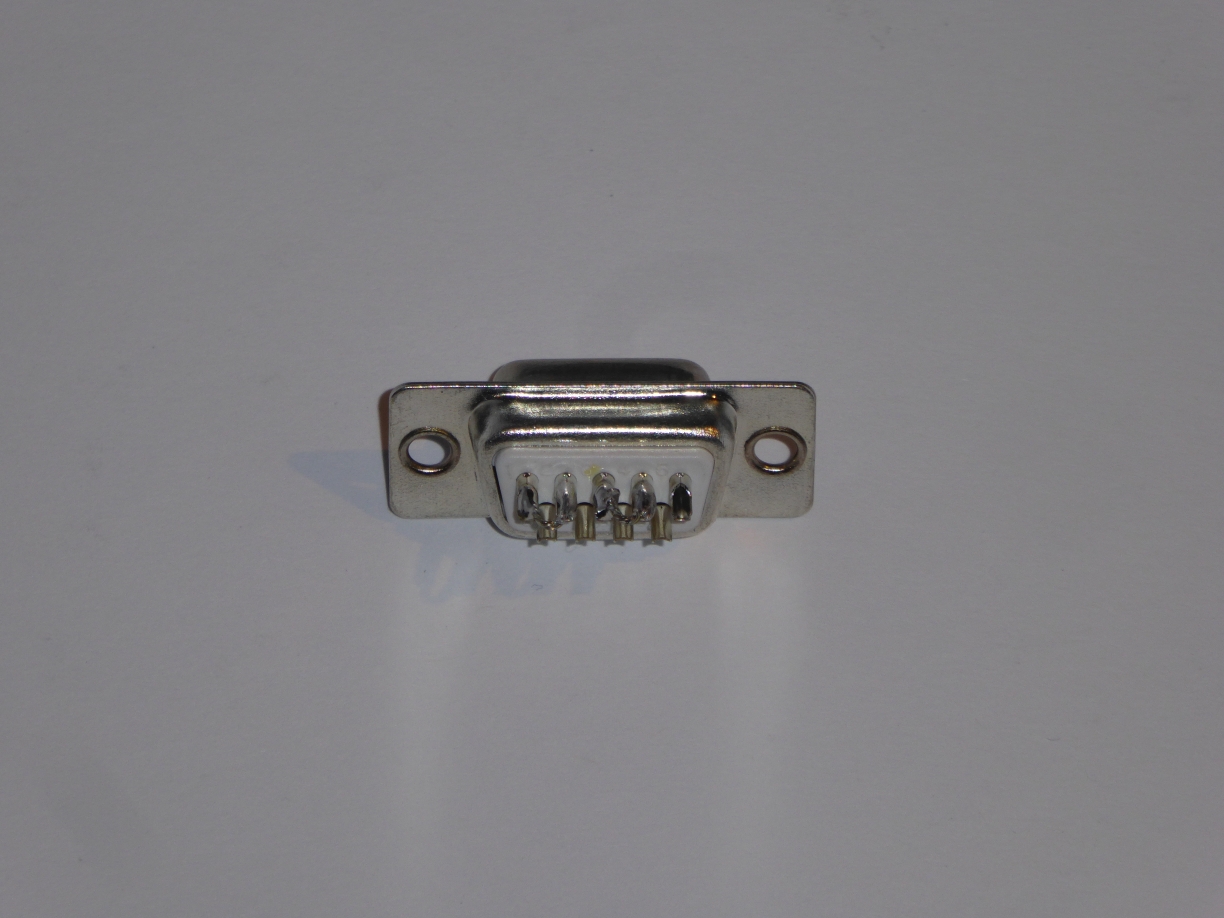
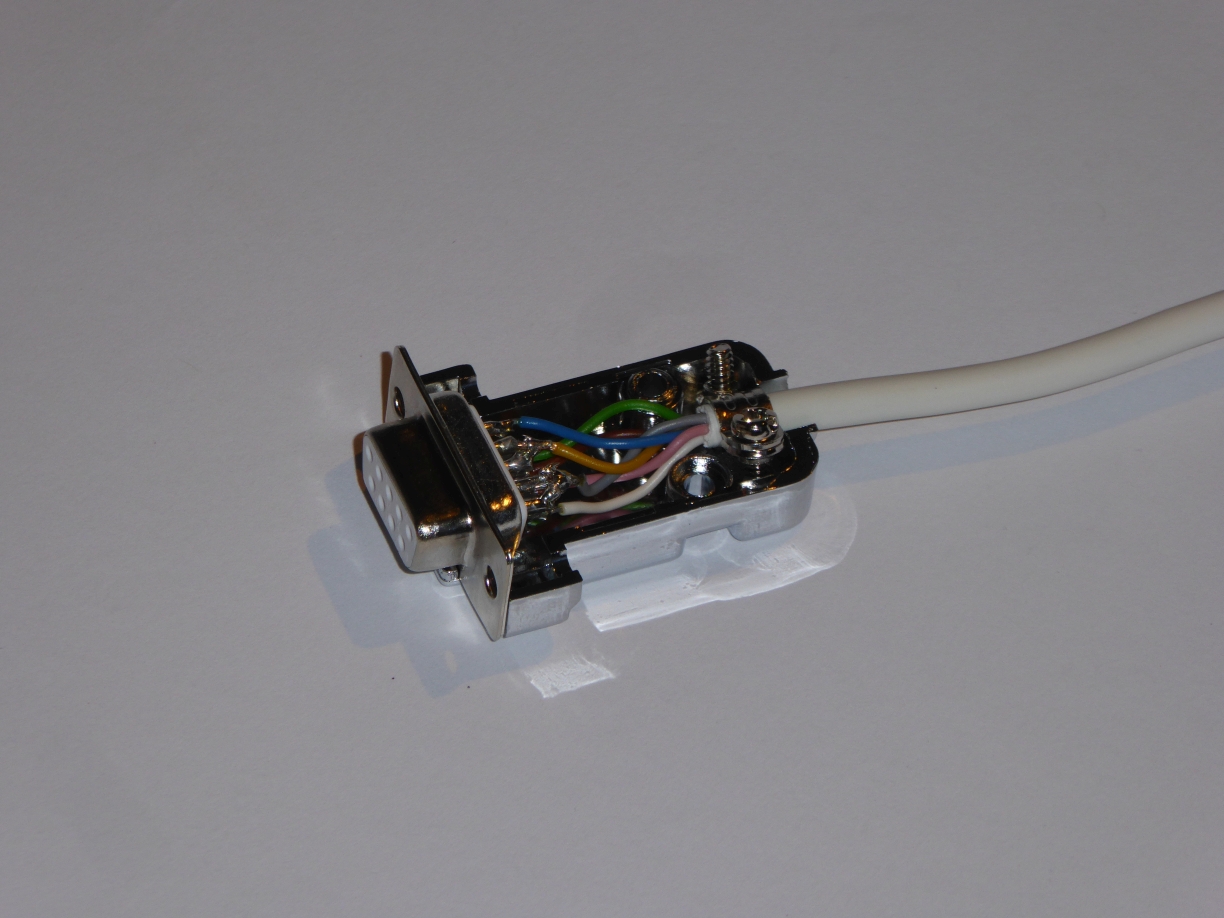
Next step is to connect the control wire on the one hand side with the D-sub connector and on the other hand side with the case. You should directly connect the pins 1 and 2 ("Fire B" if both are connected to the ground) and the pins 3 and 4 (indicates LEDmePlay® Joypad if both are connected to the ground). The easiest way is to directly connect the pins at the rear side of the D-sub female connector as shown on the left picture below with a short stripped wire. Solder the 7 lines of the control wire to the D-sub female connector (you now need just 7 lines) and use a strain relief as shown on the middle picture below. Another strain relief should be used inside of the joypad case. This is shown on the right picture below.
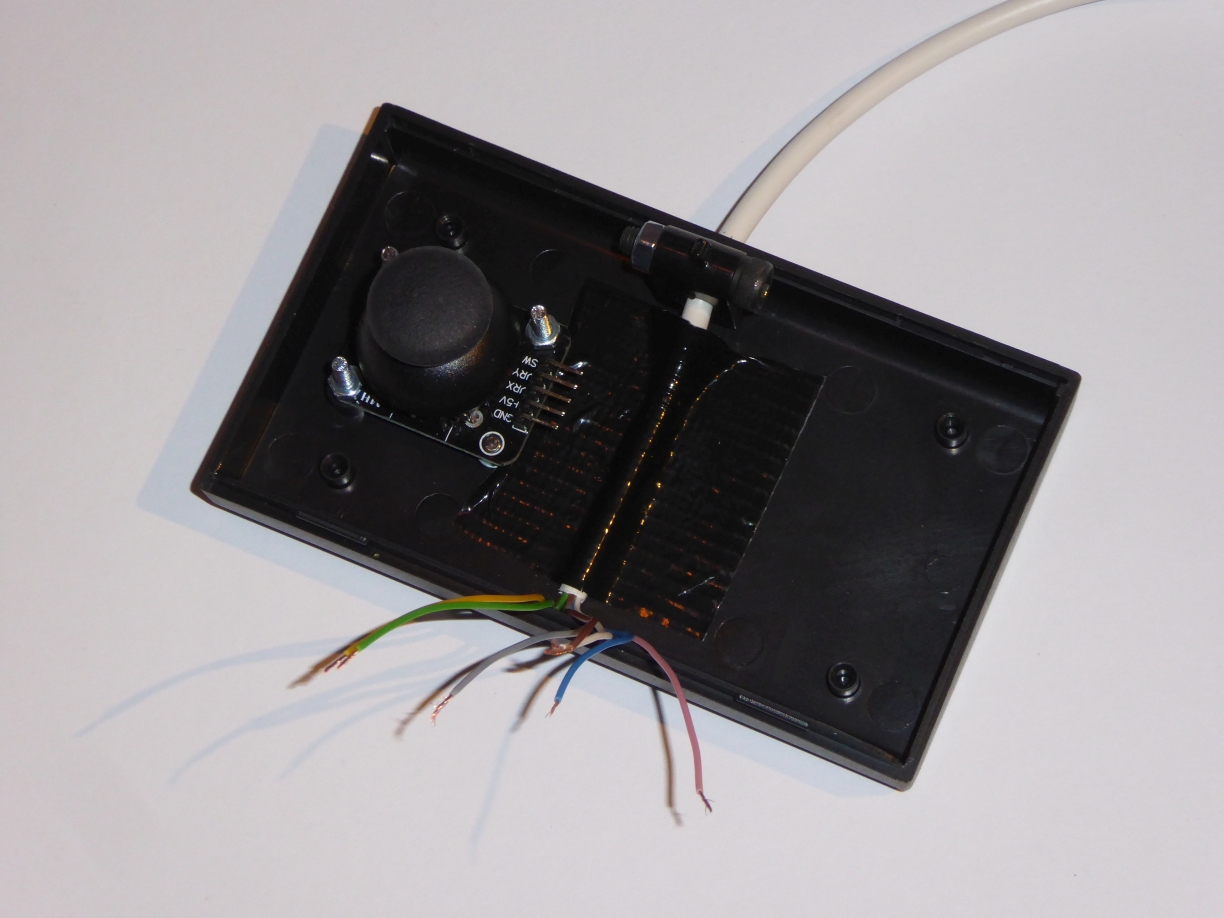
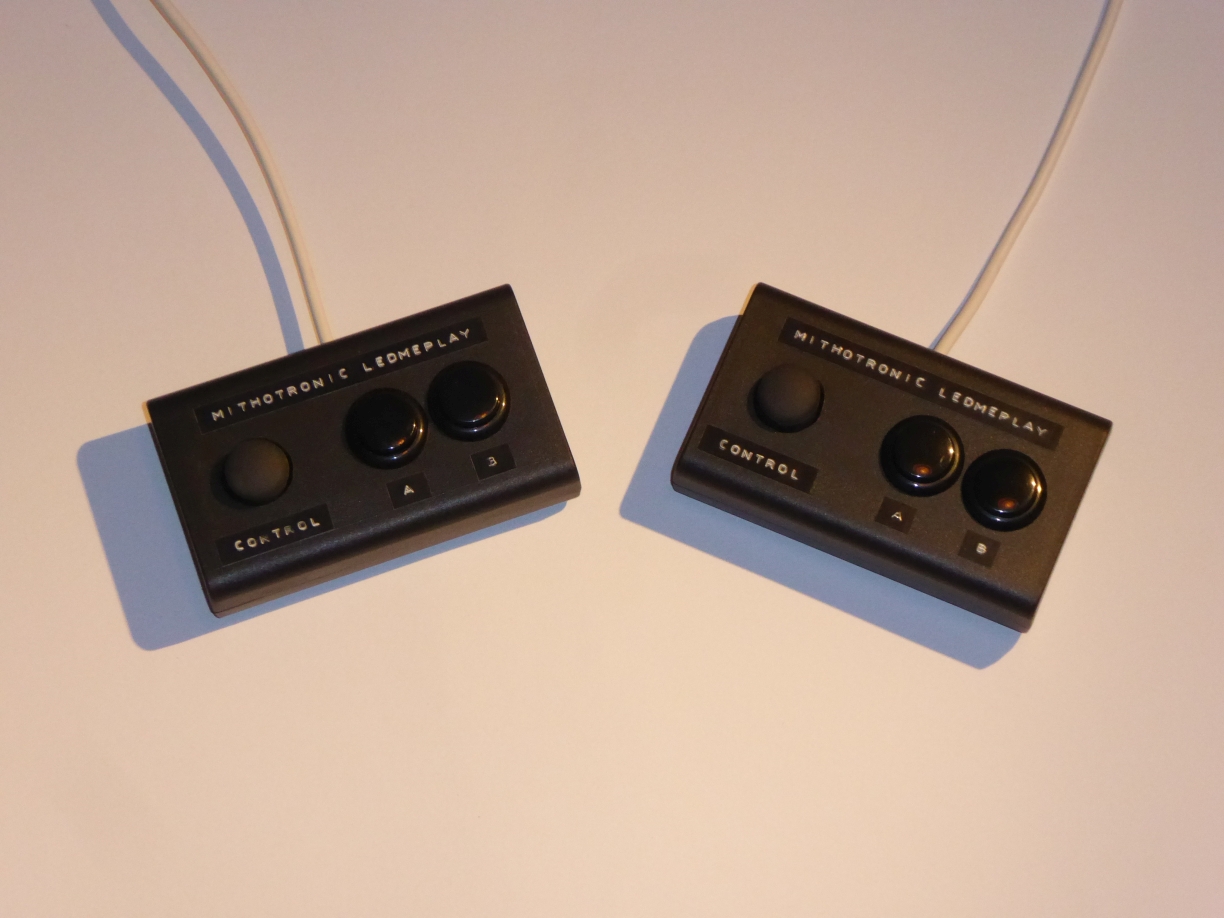
After that, you just have to solder the lines inside of the joypad to the pins of the thumb joystick (we recommend the use of a female connector which is soldered to the cable and is then imposed to the joystick pins) and the buttons. If you use the scheme as shown in the table above, everything should work. After that, of course you should build a second LEDmePlay® Joypad for double-player action.